Chocolate Babka
Posted in /Cooking/Breads on Saturday, February 10, 2018
I've been doing a lot of curriculum planning for my three different grade levels of foods classes. The grade 11s and 12s are currently working on a yeast module and I wanted something more than buns and sandwich bread for them. I came across this recipe on Smitten Kitchen (one of my favorite food bloggers) and I knew I needed to try it before I let my students tackle it. The recipe is a two dayer outside of the classroom, but will be a three dayer for my students, so that will work out well for my their class. The loaf didn't rise as much as I was hoping but that is due to the fact that I used traditional yeast (which I always have in my fridge) and not quick rise yeast. Nevertheless, the loaf is beautiful and my house smells AMAZING!
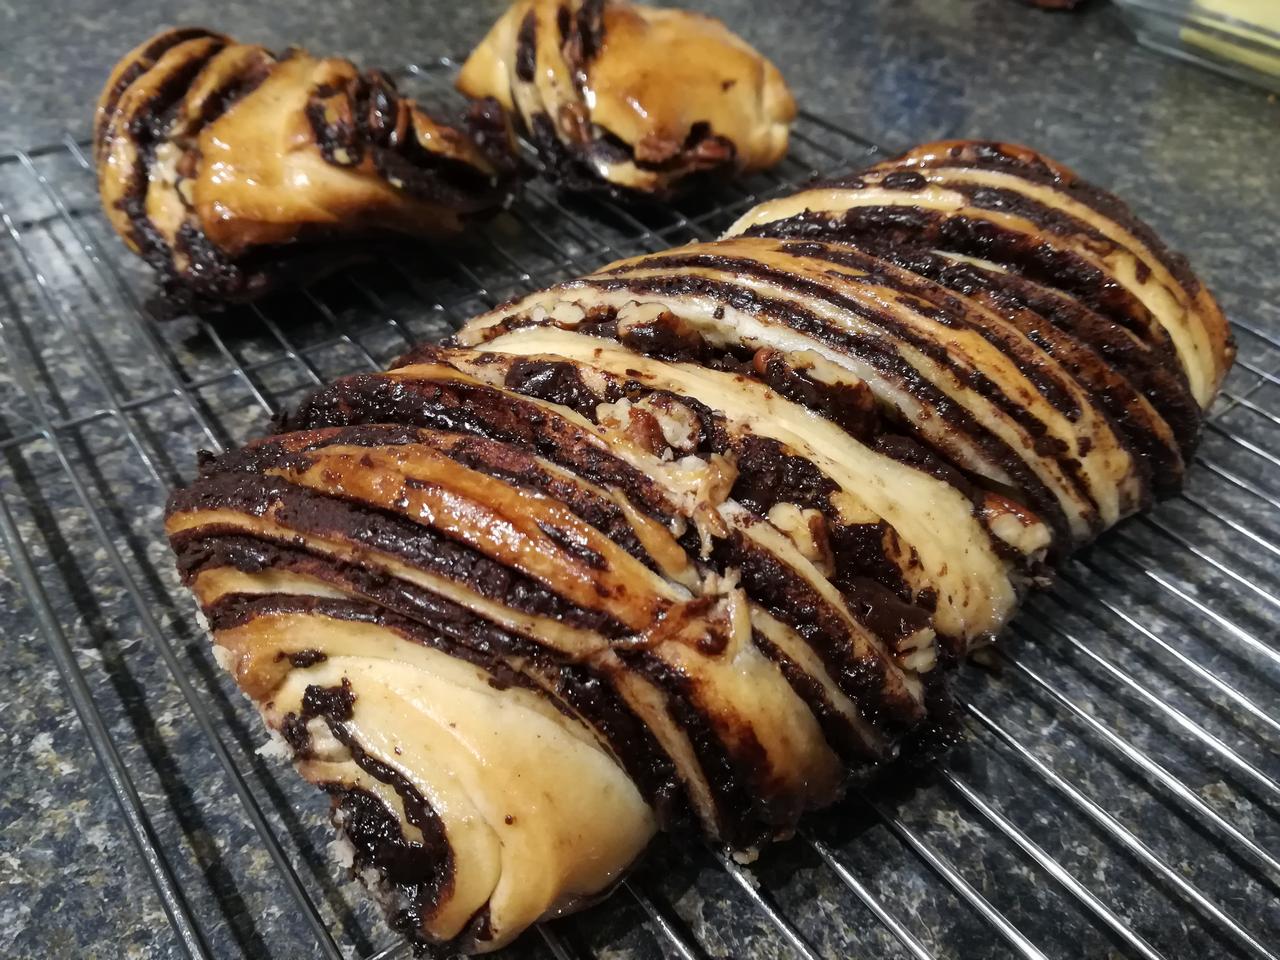
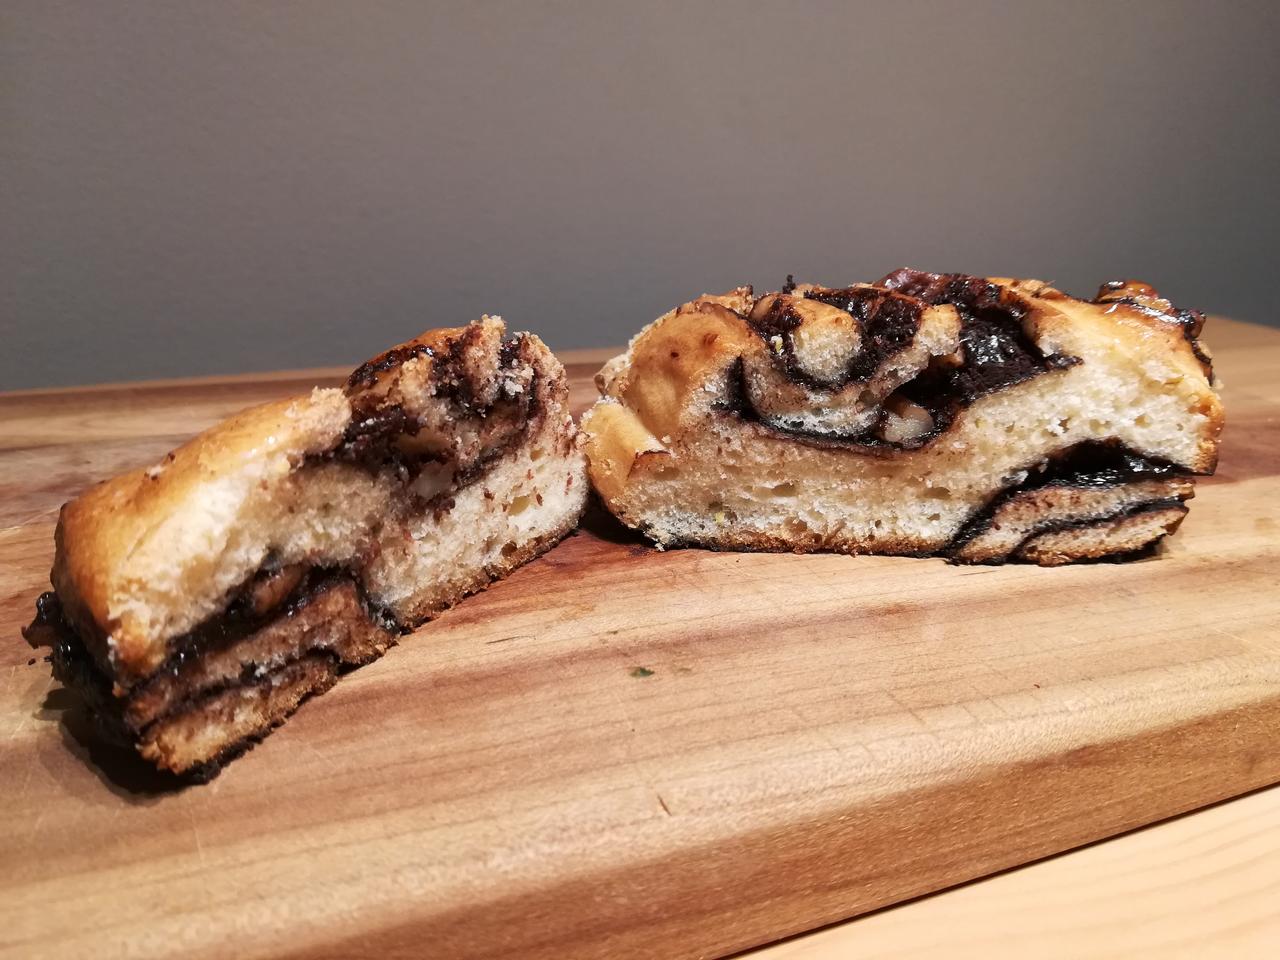
Yield: 1 loaf and some tasty ends
Ingredients
Dough
265 g flour, plus extra for dusting
50 g white sugar
1 teaspoons instant yeast (not traditional)
Grated zest of 1 small lemon or half an orange
1 1/2 large eggs
1/4 cup water (cold is fine) and up to 1 to 2 tablespoons extra, if needed
2 ml teaspoon fine sea or table salt
1/3 cup (75 g) unsalted butter at room temperature
Filling
65 g semi sweet or dark chocolate chips
1/4 cup (60 g) unsalted butter, cold is fine
25 g powdered sugar
15 g cocoa powder
handful of pecans (optional)
Syrup
45 ml water
3 Tbsp white sugar
Directions
Day 1
1. Make the dough: Combine the flour, sugar, yeast and zest in the bottom of the bowl of a stand mixer.
2. Add eggs and water, mixing with the dough hook until it comes together; this may take a couple minutes. It's okay if it's on the dry side, but if it doesn't come together at all, add extra water, 1 tablespoon at a time, until the dough forms a mass.
3. With the mixer on low, add the salt, then the butter, a spoonful at a time, mixing until it's incorporated into the dough. Then, mix on medium speed for 10 minutes until dough is completely smooth; you'll need to scrape the bowl down a few times. I usually found that after 10 minutes, the dough began to pull away from the sides of the bowl. If it doesn't, you can add 1 tablespoon extra flour to help this along.
4. Coat a large bowl with oil (or scrape the dough out onto a counter and oil this one) and place dough inside, cover with plastic and refrigerate. Leave in fridge for at least half a day, preferably overnight. (Dough will not fully double, so don't fret if it doesn't look like it grew by more than half.)
Day 2
1. Make filling: Melt butter and chocolate together until smooth. Stir in powdered sugar and cocoa; mixture should form a spreadable paste.
2. Grease and flour a 9-by-4-inch loaf pan, and line the bottom of each with a rectangle of parchment paper.
3. To assemble loaf: Take the dough from fridge and roll out on a well-floured counter to about a 10-inch width (the side closest to you) and as long in length (away from you) as you can when rolling it thin, likely 10 to 12 inches.
4. Spread the chocolate mixture evenly over the dough, leaving a 1/2-inch border all around. Brush the end farthest away from you with water. Roll the dough up with the filling into a long, tight cigar. This is where you can add the pecans if desired, I only added a small row of them to make it easier for cutting and twisting later.
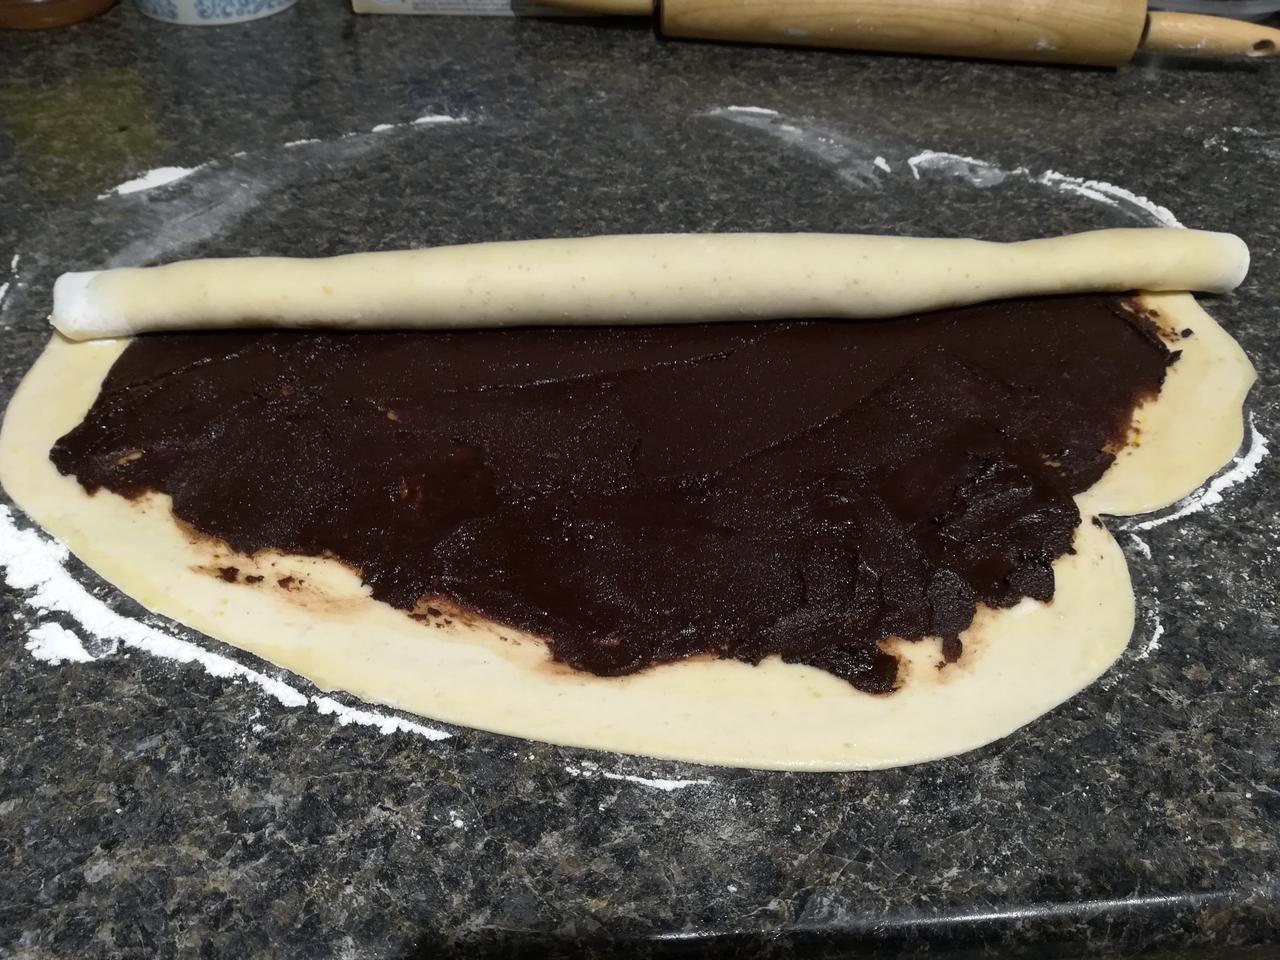
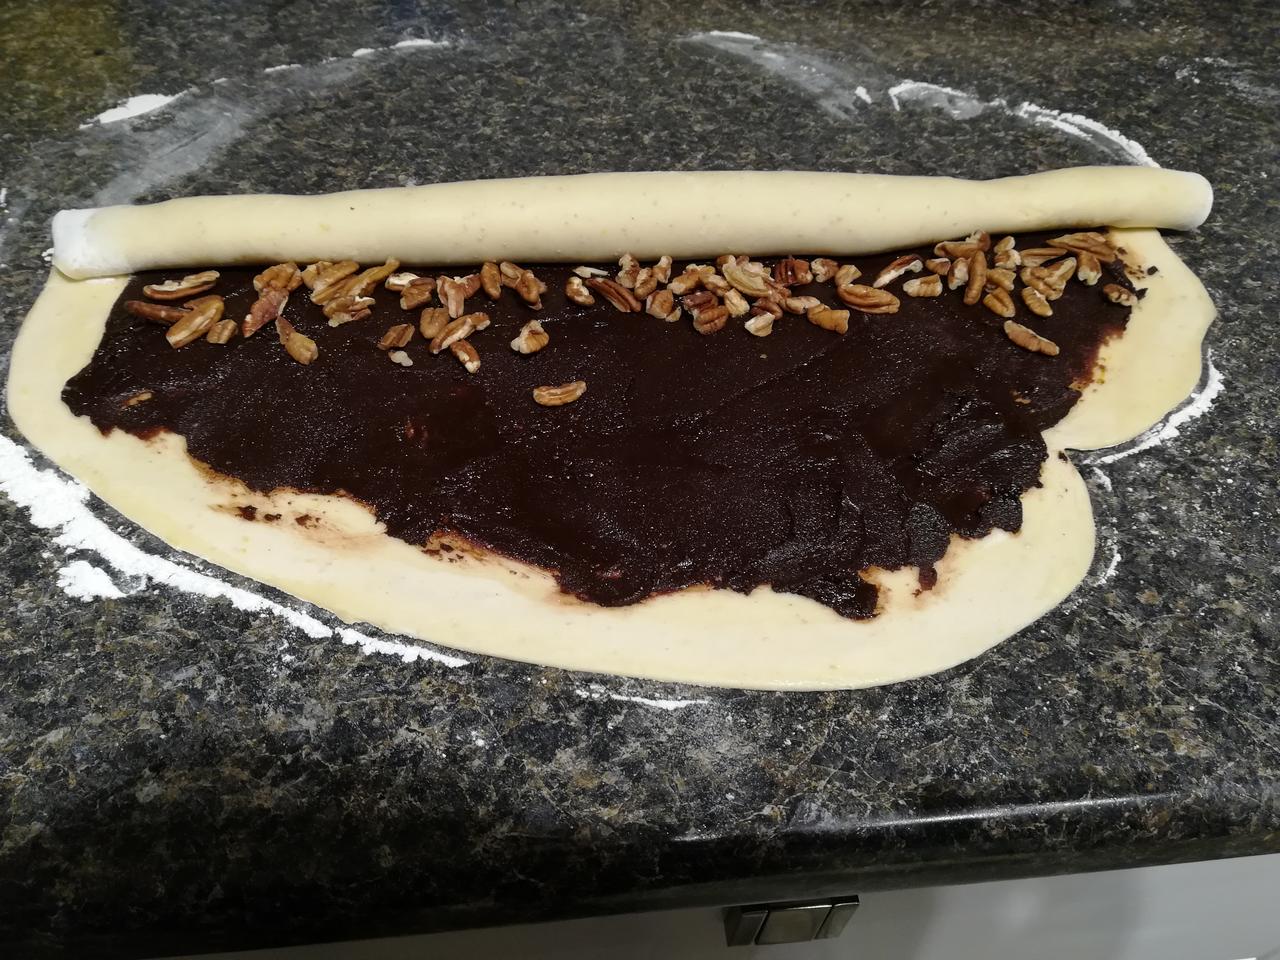
5. Seal the dampened end onto the log. Next transfer the log to a parchment covered baking tray in the freezer for 10 to 15 minutes (this makes it much easier to cut cleanly in half).
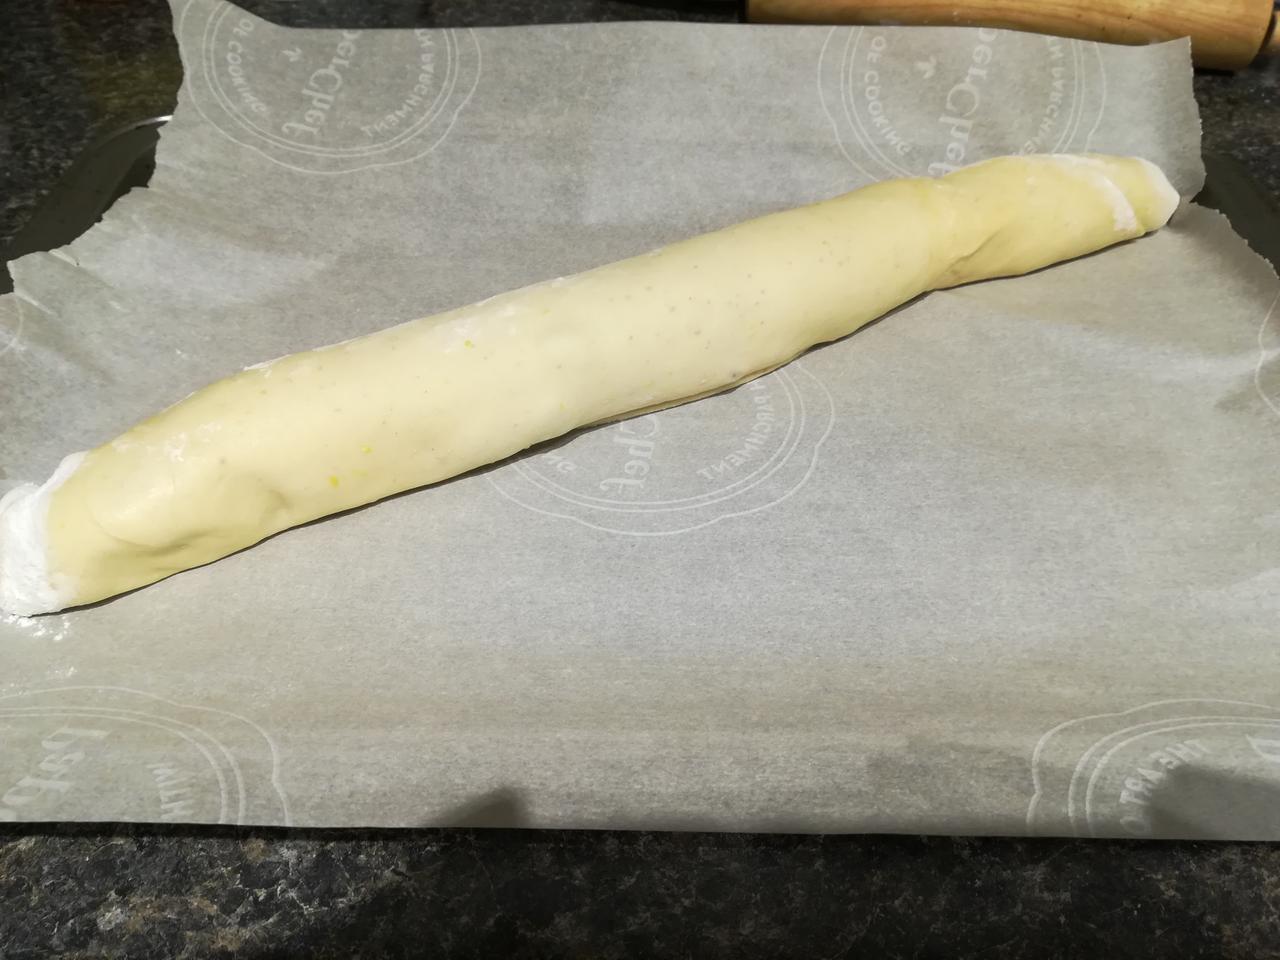
6. Gently cut the log in half lenghtwise and lay them next to each other on the counter, cut sides up. Pinch the top ends gently together. Lift one side over the next, forming a twist and trying to keep the cut sides facing out (because they're pretty). Brush the areas where the dough touches dough in your twist and pinch together to make it stick.
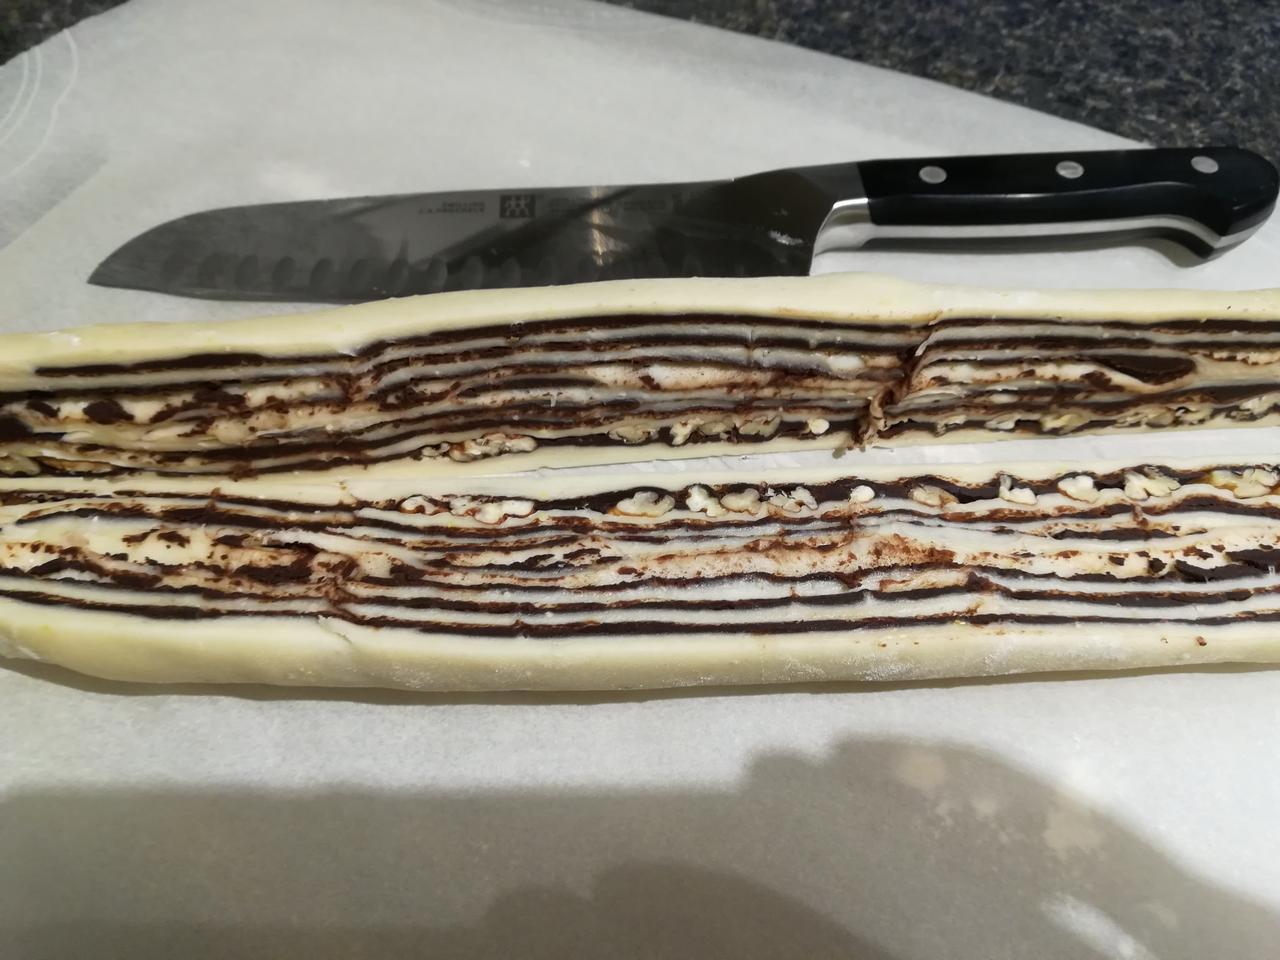
7. Next, cut off the ends of the twist so it will fit in your loaf pan when you squish it together a bit, then transfer the twist as best as you can into the prepared loaf pan. You can try to nest the trimmed ends of the log in the gaps if there is room, or bake them separately as I did.
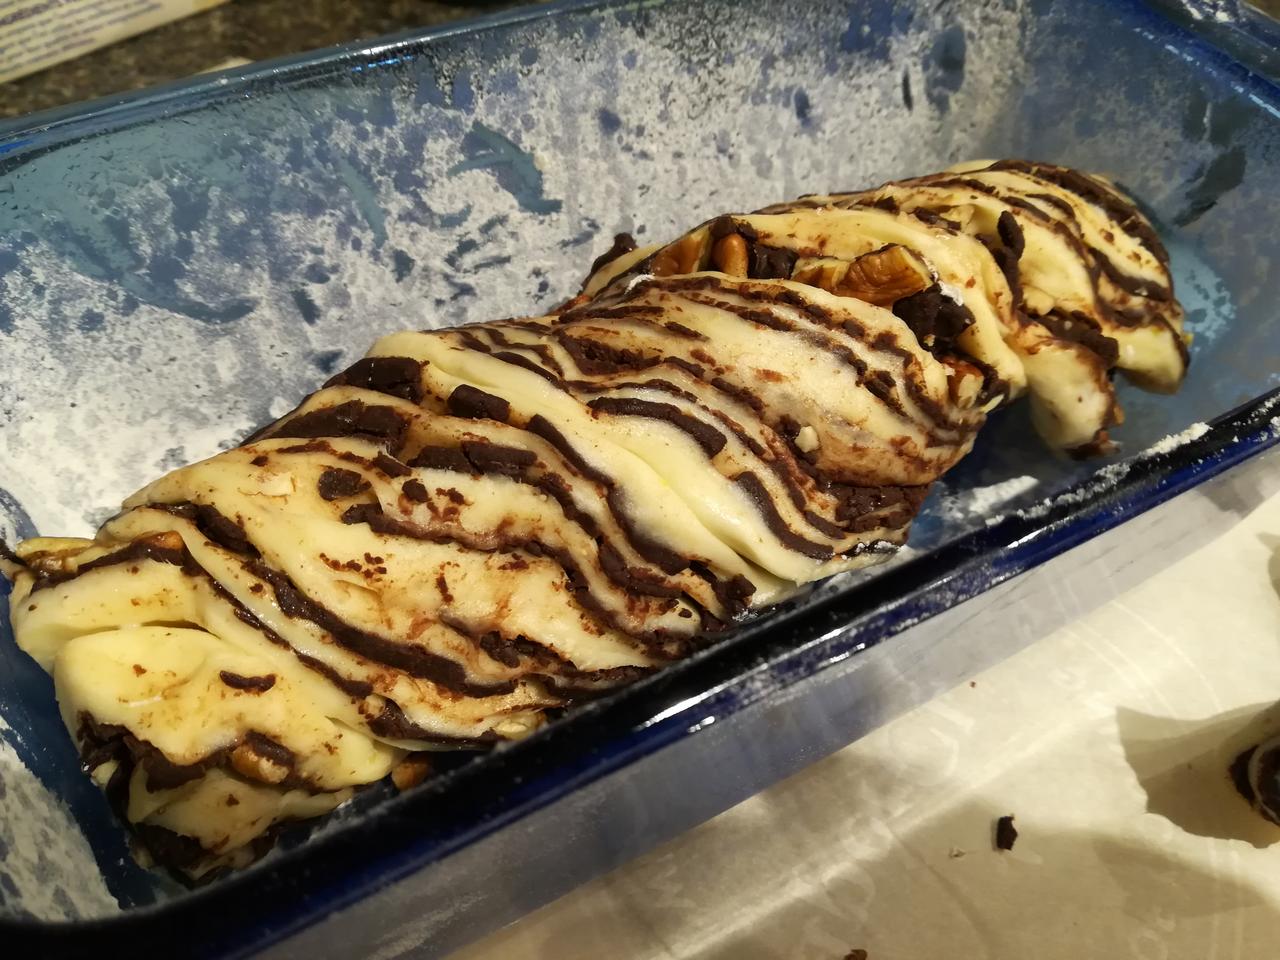
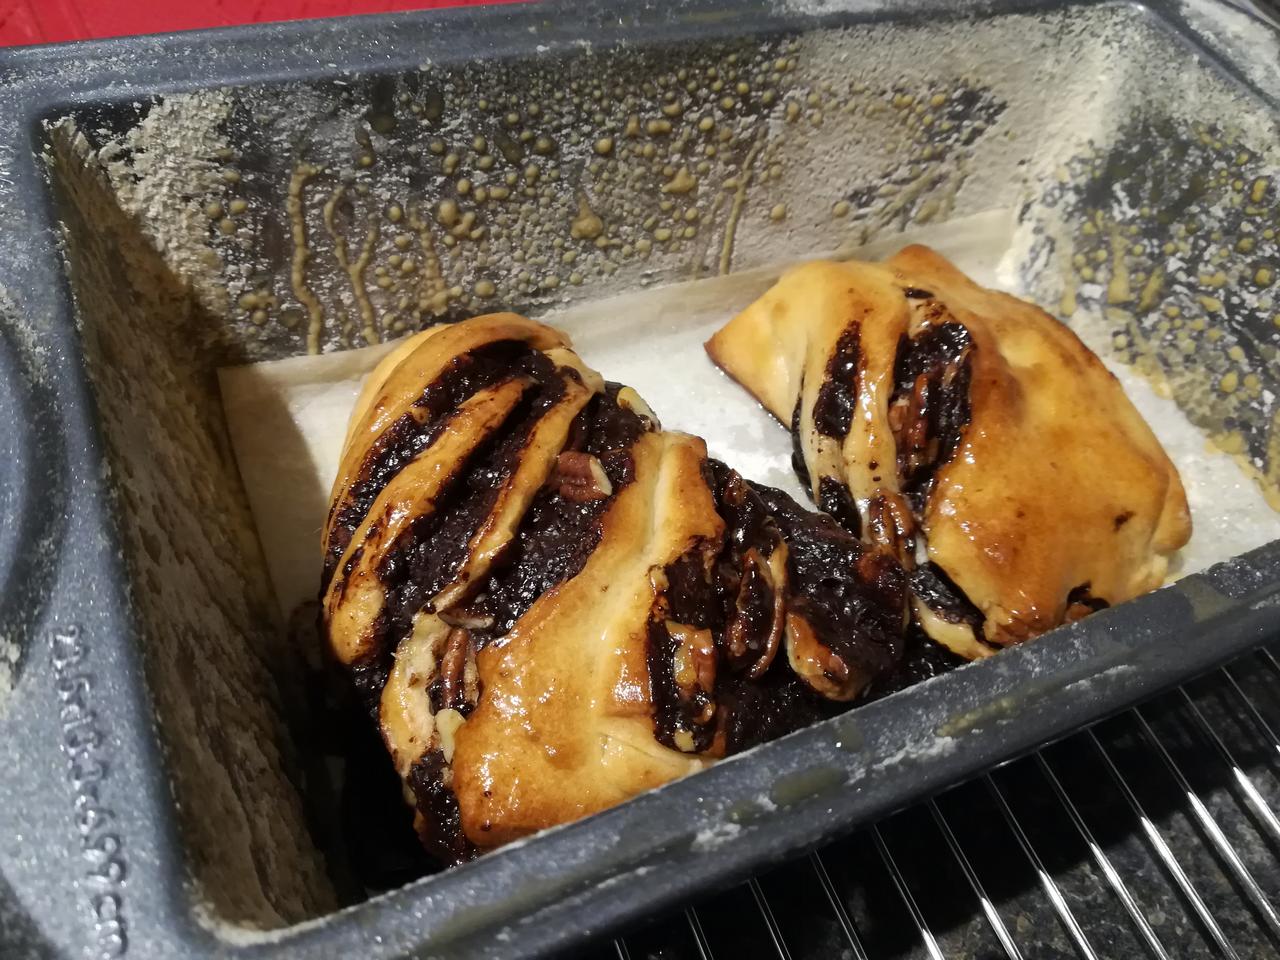
8. Cover with a damp tea towel and leave to rise another 1 to 1 1/2 hours at room temperature.
9. Preheating your oven to 375F. Remove towels, place each loaf on the middle rack of your oven.
10. Bake for 30 minutes, but there's no harm in checking for doneness at 25 minutes. A skewer inserted into an underbaked babka will feel stretchy/rubbery inside and may come back with dough on it. When fully baked, you'll feel almost no resistance. If you babka needs more time, put it back, 5 minutes at a time then re-test. If it browns too quickly, you can cover it with foil.
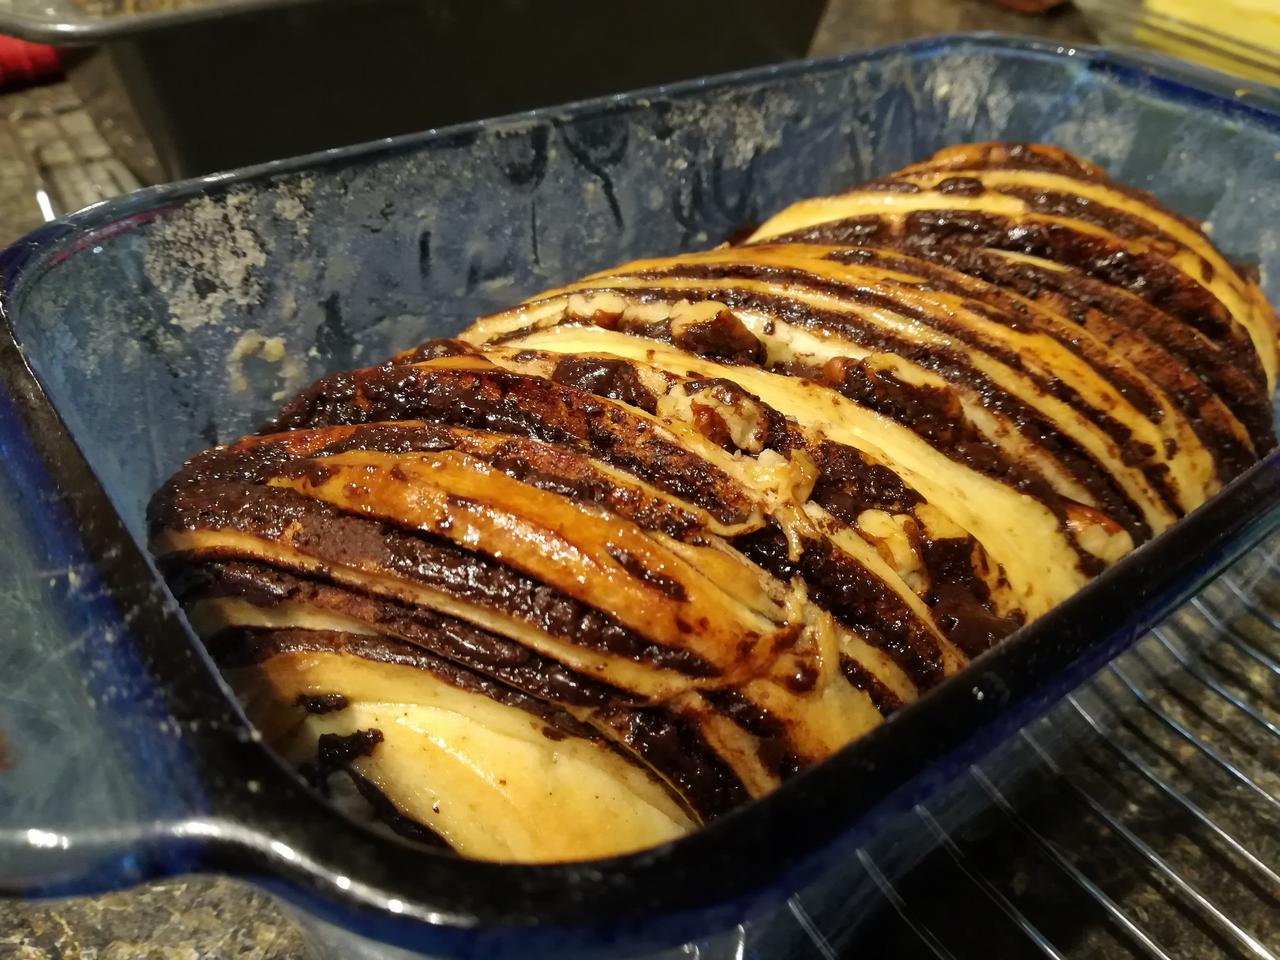
11. While babkas are baking, make syrup: Bring sugar and water to a simmer until sugar dissolves. Remove from heat and set aside to cool somewhat. As soon as the babkas leave the oven, brush the syrup all over each. It will seem like too much, but will taste just right - glossy and moist.
12. Let the loaf cool about halfway in pan, then transfer to a cooling rack to continue cooling


Note
- Babkas keep for a few days at room temperature, any longer and they'll need to be frozen. They freeze and defrost really well.
Inspired by: Smitten Kitchen
Writeback