Croissant
Posted in /Cooking/Breads on Tuesday, February 20, 2018
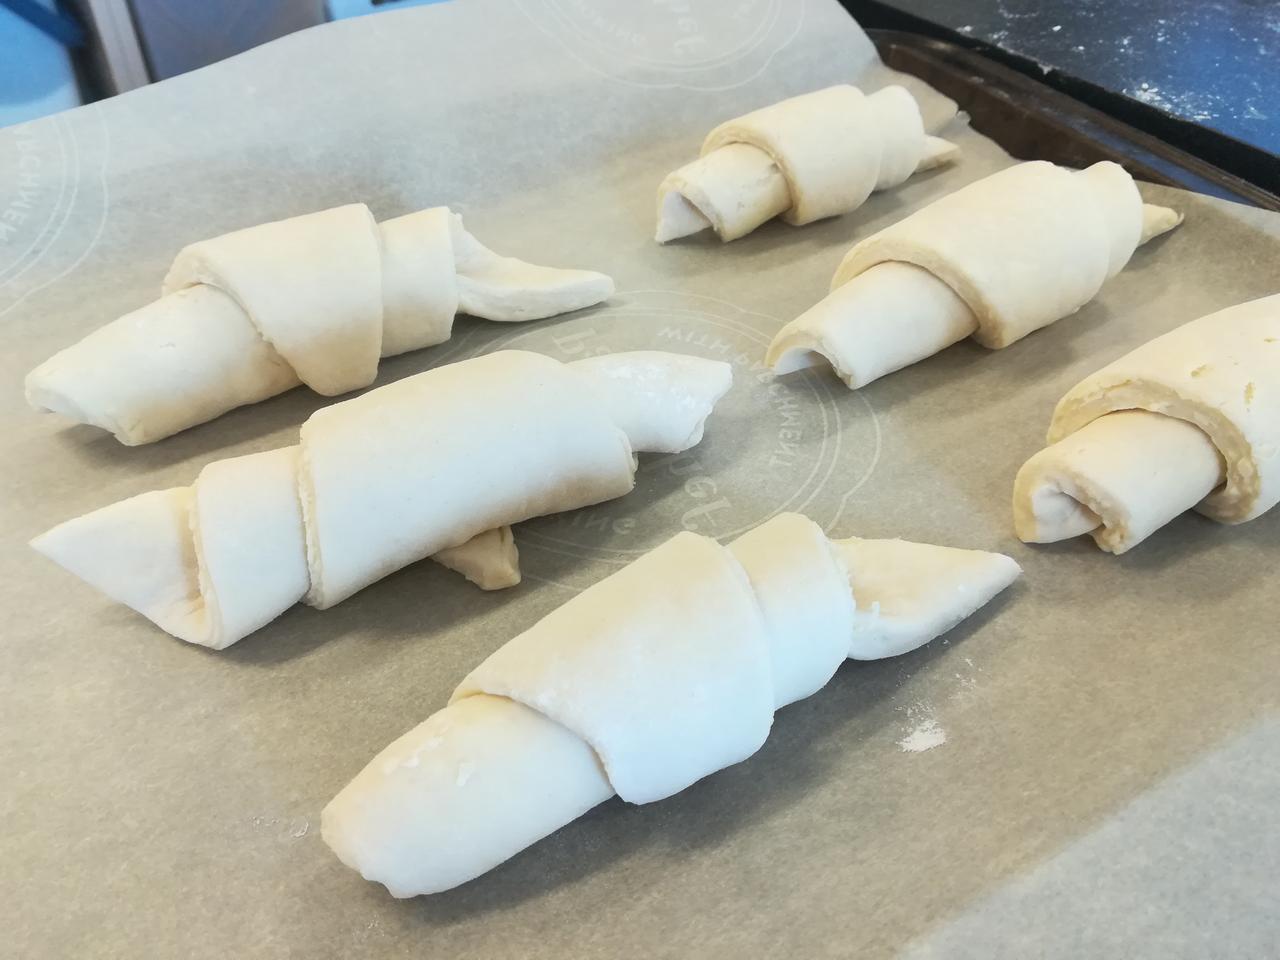
I did not do a photo tutorial for this recipe because Joe Pastry has a perfect one on his site...see link at the bottom of this page. And because my hands were far to greasy from all the butter to pick up a camera. The pictures are of my student's work, and I'm super impress with their products, we're going to work on the egg wash but otherwise the croissants were light and fluffy, just as they're supposed to be!

Ingredients
Poolish starter
4 1/2 oz flour
4 oz water
1/2 tsp dry yeast
Croissant dough
3 oz water
2 tsp yeast
4 oz whole milk
1 3/4 oz sugar
13 1/2 oz flour
Butter block
10 oz cold butter
1 Tbsp flour
Croissant assembly
2 large egg yolks
optional fillings
Directions
Day 1 Poolish (starter)
1. Prepare the poolish by stirring together the flour, water and yeast to form a thick batter-like dough. Cover and let stand for 3-4 hours or until you see lots of bubbles on the surface, or place in the fridge overnight
Day 2 Croissant dough
2. Make the dough by combine the prepared poolish with water and yeast in the bowl of the stand mixer fitted with dough hook. Stir with a spatula to break up the poolish and dissolve the east; it's OK of the poolish remains in blobs. Stir in the milk and sugar, then add the flour. Stir to form a shaggy dough, then knead at low speed until the dough comes together in a smooth, slightly tacky ball, roughly 5 minutes in the mixer. Add extra flour as needed if the dough is bubble-gum sticky, but avoid this if possible.
3. Cover and let the dough rise at room temperature for 30 minutes: the dough should roughly double in size. Make the butter-block while the dough is rising.
4. Transfer the dough to a large, square container with a lid.
5. Make the butter-block by placing a sheet of plastic wrap on your counter. Break the butter into a few large pieces on the saran wrap and sprinkle with a tsp flour. Place another sheet of plastic wrap on top of the butter. Begin pounding the butter with a rolling pin to soften it. Pound the butter flat, then gather it up again. Sprinkle with another tsp flour, pound flat, and repeat. Add one more tsp flour, then continue pounding and gathering , pounding and gathering, until the butter is very pliable and does not break when you fold it over on itself.
6. Once the butter is pliable, shape it into a 4×4 inch square, wrap in plastic and chill for 5 minutes (no longer)
7. Remove the dough from the fridge and roll out to a roughly 7 inch square
8. Wrap the butter in the dough: place the square of butter on top of the dough at a 90-degree angle to the dough. Fold the corners of the dough over the butter so they meet in the middle. Pinch to seal.
9. First turn: flour the work surface lightly and flip the butter package over so the seams are down. Roll it out to a rectangle roughly 12 inches long by 6 inches wide. Fold in thirds, like a letter.
10. Second turn: Rotate the folded dough so it looks like a book about to be opened. Roll it out again into a rectangle 12 inches by 6 inches. Fold it again.
11. Mark 2 divots in the edge of the dough to remind yourself that you've done two turns. Wrap the dough in plastic and chill for 10 minutes.
12. Do two more turns: Repeat rolling out and folding the dough two more times. The dough should feel much more smooth and pliable at this point. If you notice any butter popping up through the dough, pat it with a little flour.
13. Mark 4 divots in the edge of the dough to remind yourself that you've done 4 turns. Wrap in plastic and chill for 10 minutes.
14. Perform two final turns: repeat rolling and folding the dough two more times for a total of 6 turns. By this point, the dough should feel completely smooth and be easy to roll out.
15. Wrap in plastic and chill overnight.
Day 3 Shape the croissants
16. Roll the chilled dough out to a rectangle roughly ? inch thick
17. Shape the croissant: using a bench scraper, pizza cutter or sharp knife, slice it lengthwise (the long way) down the middle. Cut each half into 6-8 equal-sized triangles. Roll up each triangle, starting at the wide end. Transfer the rolls to parchment-lined baking sheets and space them about 2 inches apart. This is also where you would add a filling if desired.
18. Let the croissants rise about 20 minutes. They should look puffy and you'll be able to see the layers in the cut edges. Heat the oven to 400F while the croissants are rising. Alternatively, you can refrigerate the croissants overnight to develop their flavor and let them rise in the morning.
19. When ready to bake, whisk together the egg and milk in a bowl, and brush each of the croissants with a thin layer. Transfer the croissants to the oven and bake until the croissants are deep golden-brown, very crisp, and feel light when you pick one up, 20-30 minutes. Rotate the trays halfway through baking.
20. Cool and eat! Let the croissants cool for a few minutes and then eat right away. They are at their very best straight out of the oven. Leftovers can be re-crisped in a toaster oven or for a few minutes in a warm oven.


Inspired by: Joe Pastry
Writeback